No matter what you want to create - a slideshow or amateur film - text captions can enhance the result and improve the general impression of your movie. Text comments or explanatory notes can also be required when preparing a video tutorial.
Using AVS Video Editor you can add subtitles to your video, adjust the text properties and define the way the captions appear and disappear on the screen. It's possible to add different captions (static and animated), namely: specially designed titles, balloons, creeping line, and even scrolling text like the one used in Star Wars.
This guide describes the process of adding text to your video in general. Once you import your video to the program and add it to the timeline, follow the steps below to easily insert subtitles in your video.
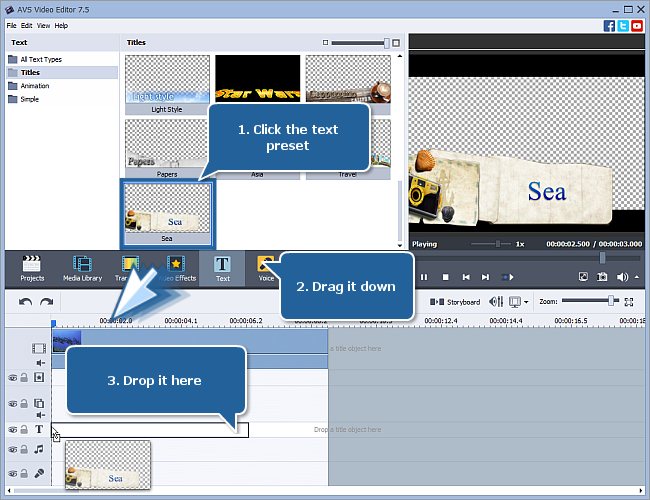
Click the Text central button to display all the available text presets. Switch to the necessary text group located on the left. You can choose one of the following text types: Titles, Animation, Simple.
Select one of the available text presets and drag and drop it to the appropriate line of the Timeline. Alternatively, you can right-click the necessary preset and select the Add or Replace Text option from the menu.
 Note
Note: it's also possible to add a caption at the beginning or at the end of the video clip by dragging the text preset directly to the main video line. In this case, a black background is automatically added to your text. To use another color, select the background on the
Timeline and use the
Change Color button above.
[Back to the Top]
The text block will be placed at the cursor position on the Timeline and will occupy the standard room within the line for texts. If necessary, you can change the text block position and duration.
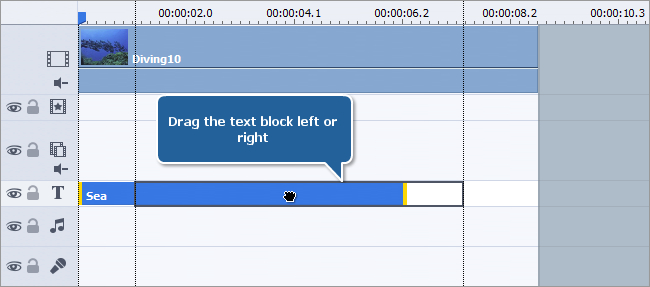
To change the position of the text block in the movie, left-click it and drag left or right to a new place.
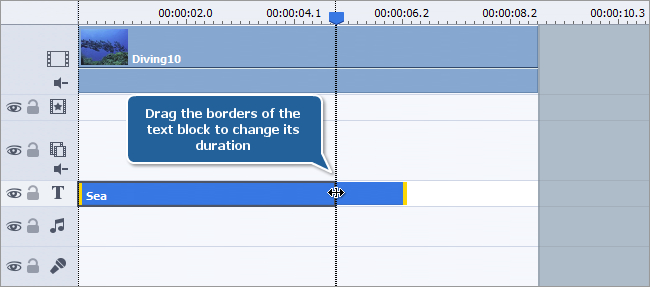
To set the exact moments when the text appears and disappears in your video, drag the boundaries of the text block to the right or to the left.
[Back to the Top]
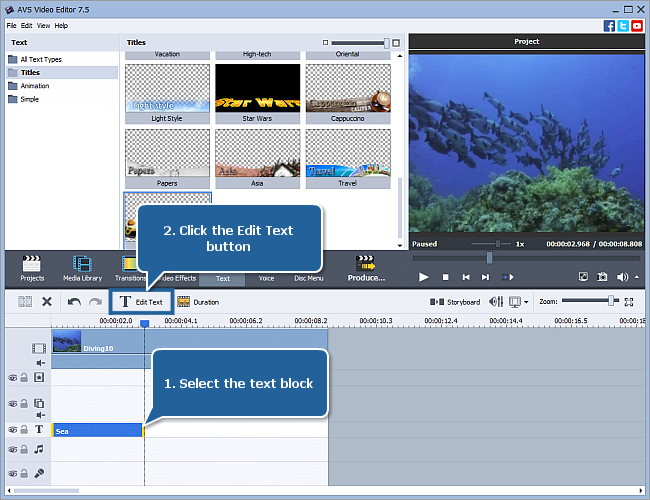
Select the text block and click the Edit Text button on the Timeline Toolbar or double-click the text block on the Timeline to open the text properties window.
Select the default text within the preview area, remove it using the Backspace or Delete key and type in your own text instead.
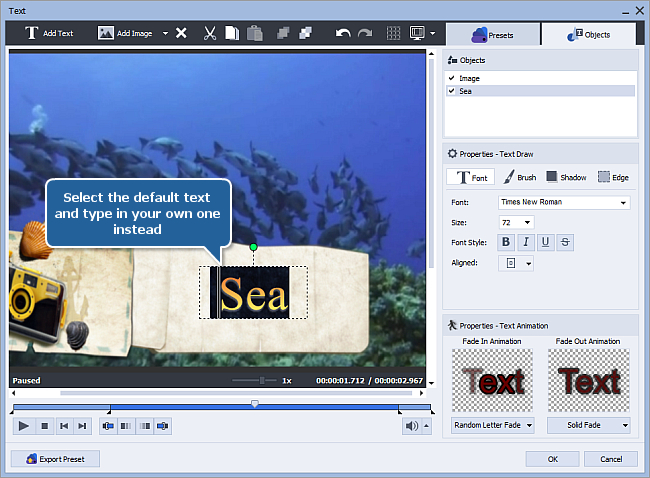
Now you can adjust the font properties to customize the text appearance. Use the Properties - Text Draw panel in the right part of the window to change the font formatting. The Font tab is activated by default.
Choose your preferred font type from the list and select the appropriate font size. Set the necessary font style:  Bold,
Bold,  Italic,
  Underline or
  Strikeout. It's also possible to select one of the alignment types (the text is aligned within the text box).
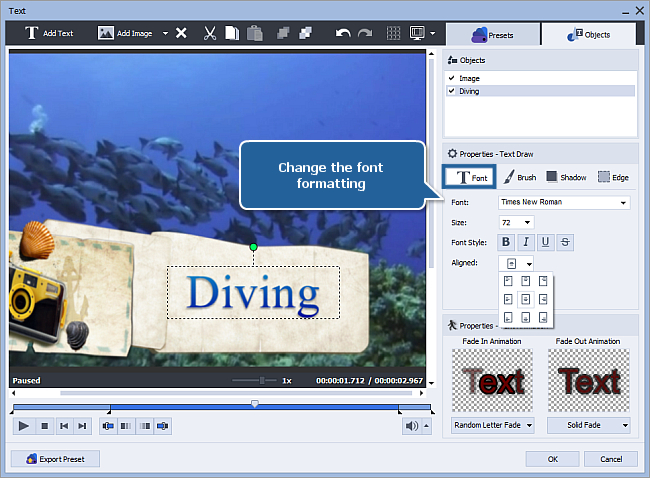
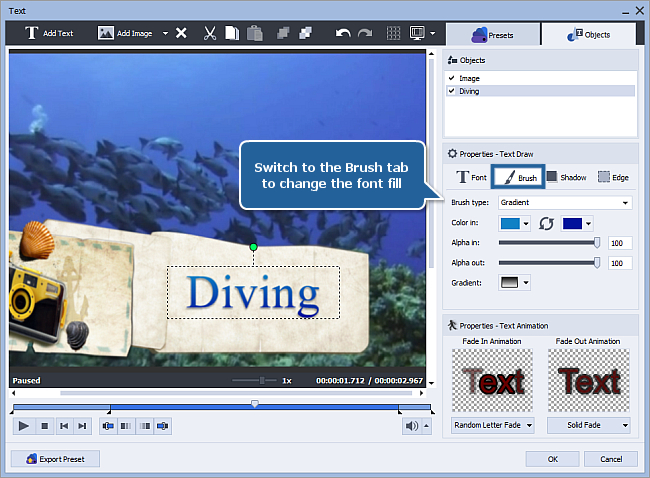
If necessary, you can also change other text properties. For example, switch to the Brush tab of the Properties - Text Draw panel to select the fill type and color. To make your text clearly distinguishable, use the Edge tab that allows to choose the outline color and size. Open the Shadow tab to enable the shadow, select its color and adjust other parameters.
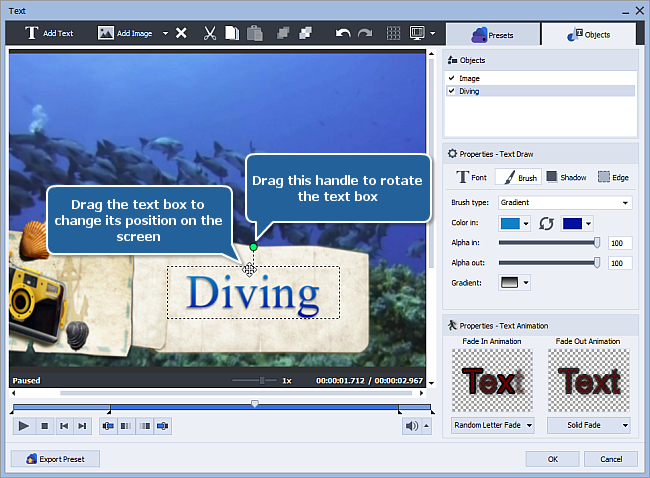
You can change the position of the caption on the screen. It's possible to make the following adjustments:
- Set the caption position. Hover the mouse pointer over the text until it turns into a cross with arrows
 , hold the mouse button and drag the text box to a new position.
- Change the text orientation dragging the green rotation handle
 .
.
To learn more about other possibilities of adjusting your text in the video, you can refer to our Online Help.
[Back to the Top]
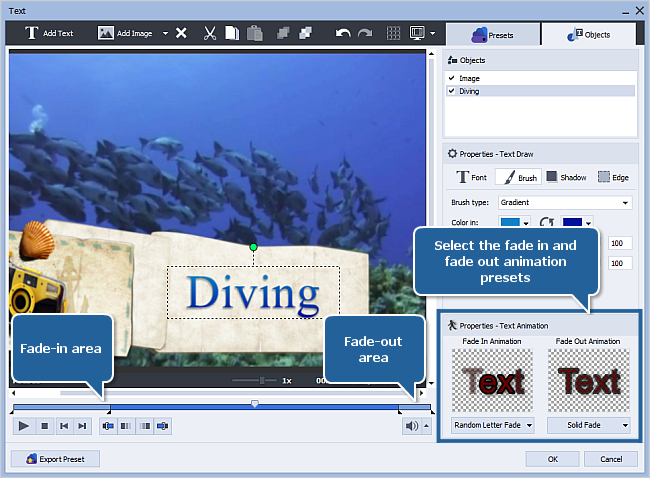
To customize the way your text appears and disappears in the video, you can select other animated effects instead of the default ones. To do that, use the Properties - Text Animation panel on the right and select one of the available presets.
You can also extend or shorten the fade in animation duration dragging the fade in area border. Then adjust the fade out animation duration in the same way.
Preview your video with the added text to make sure you got the necessary result. Please, press the  button within the Preview Area of the same window to start playback.
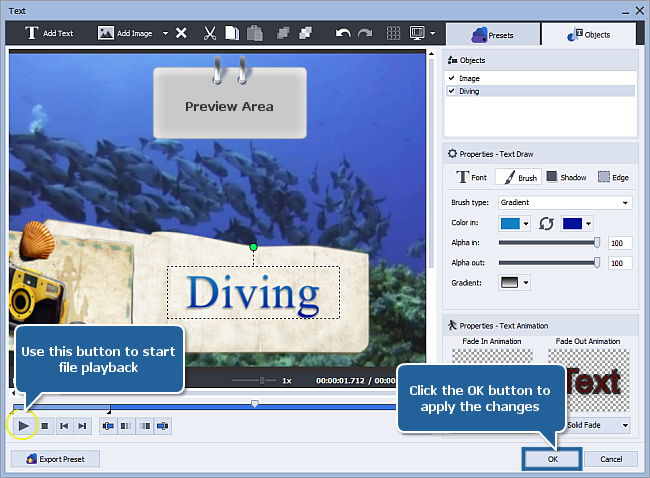
If you are completely satisfied with your video, click the OK button to accept all the changes and close the text properties window.
If you have added more than one text effect, you can preview the entire video once again using the Preview Area in the main program window. Now you can save the current project, as well as the edited video file into one of the supported formats. To learn more about it, read the How to save the project and the video in AVS Video Editor? guide.
That's all. You have just successfully added subtitles to your video.
[Back to the Top]
Please note that AVS4YOU programs do not allow you to copy protected material. You may use this software in copying material in which you own the copyright or have obtained permission to copy from the copyright owner.